
following post is an edited excerpt from the forthcoming title: The Scale Modelling Photography Manual.
Before we begin to think about the practical techniques which help us take better images of our models, we need to absorb some key theories and grasp the basics of the science behind what we are doing.

Mythbusting 101: Awesome gear doesn’t guarantee awesome shots
In practical terms, the value and complexity of a camera and its millions of tiny little square image building blocks has surprisingly little to do with taking a good photo.
Light and its quality is the primary factor to a really good model photo.
The question I used to be confronted with regularly when running an Arts Faculty photography resource was “what’s the best camera I should buy?” Err, I dunno, is this a trick question? Sheesh . . .
There is no ‘best’, and unless we are doing high-end ‘pack shots’ on a daily basis or massive marketing images, it’s not crucial to have the latest mirrorless model or even a conventional 35mm camera format either for that matter, and we can get great shots with other camera types and formats (your smartphone for one).
Look at this another way – that 6 Megapixel Nikon D90 took decent shots in 2010, it still takes decent shots now. Yes, its technology has been surpassed but the fundamental tool is still solid metal gear
Let’s rephrase that: What type of camera should I get?
As far as conventional digital 35mm cameras (DSLRs) are concerned, they still provide the greatest flexibility in image control. A pre-owned model with a good prime lens (avoiding the budget zoom it’s usually bundled with) will perform perfectly well and return good value for a limited-budget start-up investment.
We can also take awesome shots with a smartphone, but these devices do have some limitations for shooting small-scale stuff. We’ll delve into these pros and cons in a series of future posts on workbench photography.
So while a highly specified full-frame (FX) pro camera will make a difference in the right hands, the outrageous cost and its black-button chic control complexities won’t be reflected in the quality of the photos taken by the majority of users. “Yeah but. . . ” you say, logic says more bucks equals more bang – well yes but there’s a reason these cameras exist – professionals use these flagship models, not to pose around town and look all macho in their safari suits with, but because they are durable and reliable and will take the knocks when used every day – those magnesium bodied black boxes are complex bits of machinery which you and I really don’t need.
This explodes the first myth of photography – flash gear and outrageous cost don’t equal gorgeous images.
Shine a light: Borderline obsessive/compulsive
So where were we? Ahh yes, appreciating that it is light that gives shape to our models, and how it defines their surface colour and textures, is maybe stating the obvious, but it is a fundamental truth and often missed when starting out. Heck, even some seasoned snappers forget the basics of light – ahem.
So where does that put us shapers and makers of styrene and resin when we decide to pick up a camera in anger?
Rule 1: It is vital to understand that it is the variable qualities of the light we use to ‘model’ the model (lighting an object in a photo studio is called ‘modelling’ light) that defines and modifies everything we see and experience in our styrene miniverse. This includes the stuff on our model bench.
Essentially: We need to have good, controllable, re-positionable light, and lots of it – we can always reduce or take it away if there’s too much.
Rule 2: The way we record this light is secondary to the need to understand how we use light, build our core skills, and even use some artistry.
Essentially: We need to obsess about our flexible light quality more, and less about acquiring flash gear or more pixels.
Rule 3: One other thing to understand is that the camera doesn’t record what our eyes see. They are a bit dim and have a very fixed view of the world. While appearing to be able to ‘see’ everything we can see, it can only respond relatively slowly to a limited fixed range of light values at any given moment.
Essentially: Our human eye continually reacts to a range of brightness, colour and contrast in milliseconds, and is way beyond the capabilities of any electro-mechanical device – digital or otherwise.
So what do this mean for us modellers?
Our various strands of model-making activities are ever so slightly obsessed with replicating the real thing and digital photography allows us to record this miniature fidelity like never before, but achieving consistently good images is also one of our biggest frustrations.
One of the main issues is obtaining digital colour fidelity, and we can only record the true(ish) colours we see on our models by understanding a thing called white balance (WB). Being able to set up our camera to accurately respond to the type and quality of our light source will determine how accurately the colours of the model are captured in the image. It’s a key skill that must be learned early in our path to scale model photography nirvana.
Go towards the light
As model makers and photographers, we need to have a solid understanding of what light is because it plays a pivotal role in every aspect of what we do. It controls the way we experience the colours, textures, details and our sense of shape and form of our models. So it’s obvious to see that we need consistent, controllable light sources to make the most of our hobby.
Maybe this is a silly or obvious question, but what is light, and why must we accurately describe it?
Well many people assume that light just sort of ‘is’ which is fine for everyday life, but we should have a working knowledge of its physical state and how it is formed if we aim to control it in our creative pastimes.
Sciency stuff
Light is finite and it conforms to some rigid rules. It consists of minute sub-atomic particles called photons which are the product of sub-atomic electron decay activity (the distance this electron moves or falls in the atom determines the colour of the photon) which creates a visible packet of energy source which then travels in straight lines away from the thing making the photons (the sun, lightbulb, computer screen, and so on).
Light is described by three measurable values:

I’ve seen the light!
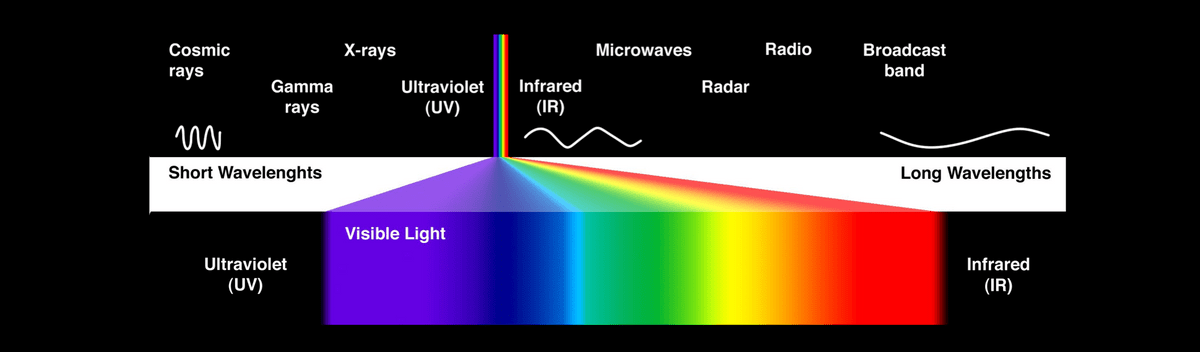
Visible (white) light is made up of a continuous spectrum of colours which all have a slightly different wavelength and this sits between the invisible ultraviolet (UV) and infrared (IR) wavelengths on the electromagnetic spectrum. The basic diagram below shows how this works.
Unlike our eyes’ incredible capacity to adapt almost instantaneously to minute changes in light conditions, a mechanised camera (all cameras are mechanical, even digital ones) has a very limited response range and only ‘sees’ narrow fixed bands of light.
Once we get our heads around what light is and how it works we need to be able to control light. This is all essential stuff, so stick with it here.
Light, colour temperature & white balance (and why it is vital to get this right first time)
The system used to control how a camera responds to a specific colour temperature in the digital image process is called White balance (WB) and this temperature is measured using the kelvin (K) thermodynamic scale.
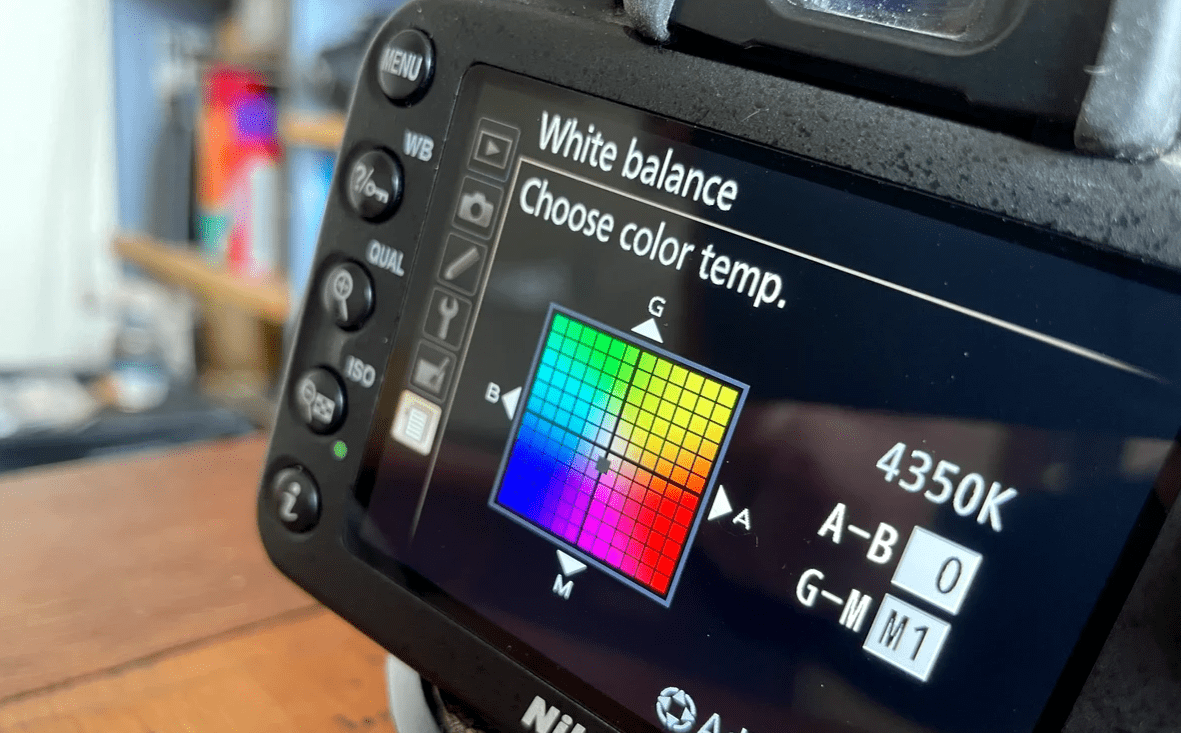
All Digital Single Lens Reflex (DSLR) cameras, and some smartphones (we can download and use Apps which allow greater control over the smartphone camera such as Reeflex and OpenCamera) have a menu function to select a specific kelvin value. Finding this setting in the cameras’ shooting menu is an essential first step in getting to know our camera.
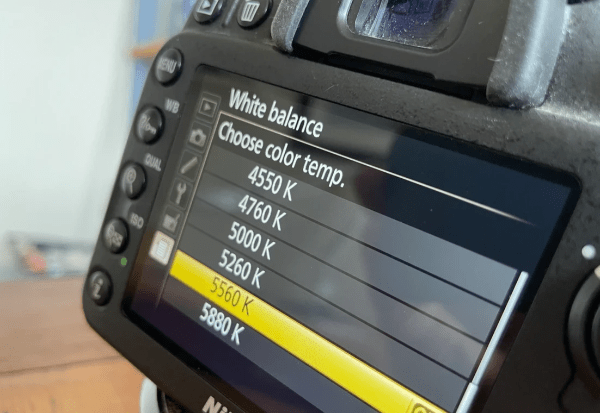
Selecting the K setting to match the known light source as closely as possible is best done using the built-in camera controls, with many cameras having a ‘fine tune’ option to modify the selected K value (errors or variations can be fixed later in an image editor such as Adobe Photoshop Lightroom – the mobile version is free).
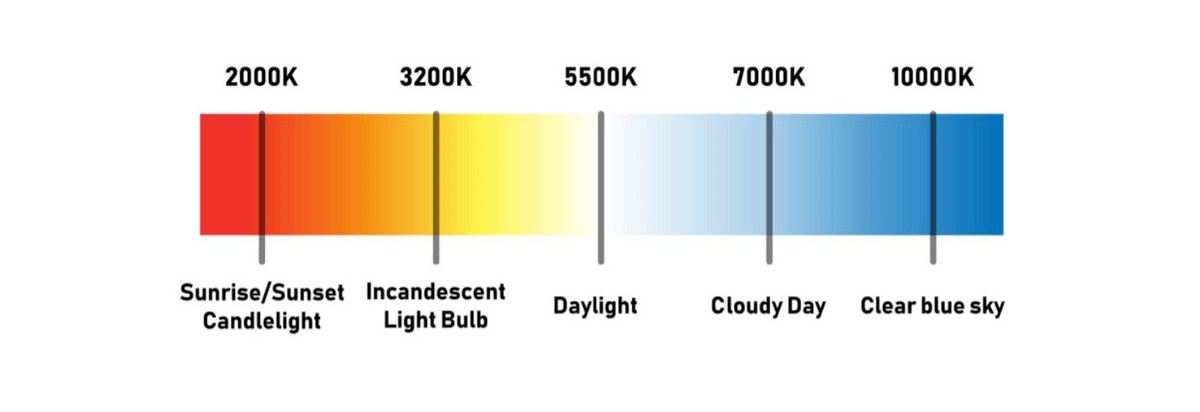
The graphic below is a basic view of where various light sources sit on the kelvin scale. Modern LED sources are not called out in the diagram and are very specifically rated to mimic ‘daylight’ K values which are usually around 5500 – 6500K – these can vary between ‘warm white'(5000 K) to ‘cool white’ (6500 K) as per the manufacturer’s commercial selling point. Pick ‘cool white’ for your light units as a rule of thumb as not all bulbs state the exact kelvin rating.
We’ll explain why we choose cool in the next section about colour rendering index (CRI).
White balance (WB) is a vital and variable image control which was always difficult with conventional film and its limited ‘latitude’ (range of response), but has become much more refined and controllable with digital. It is something that has a real impact on all the shots we take.
We need to control white balance to get the electronic pixel colour in our images as close as possible to the model’s physical pigment colour (as we experience it with our eyes, not the digital version or the one we see in magazines either – these also have colour reproduction issues due to colour system incompatibility between digital and pigment colour making processes – we’ll cover this fundamental “why does my OD41 look brown?” conundrum in the next couple of posts.
“Well, that’s obviously the wrong shade of RLM84 mate”
When starting out in digital photography, we might notice that some of our shots appear to be slightly orange, blue or even green, and the reason for this is a mismatch between the temperature of the light falling on the model and our cameras’ WB setting. As a quick fix (not entirely accurate) we need to know the rating of the LED bulb and dial this in as closely as possible to our cameras’ kelvin WB setting.
TIP: Avoid using the auto or the cameras’ built-in WB presets.
Light source quality: Colour Rendering Index (CRI)
So we know that the kelvin scale measures and controls white balance (WB) and describes the colour temperature, but what about the light source itself? The colour rendering index (CRI) of a lamp is used to give a numerical value to the accuracy of the colours it reveals on the object it shines on.
Simply put, a modern light with a CRI 100 value will contain all of the colour spectrum found in natural daylight.
What does this mean for our model colour when we think we’ve got the WB sorted and the lights in the right place? Well, lower CRI lights may be missing a certain frequency of a colour such as parts of the red or green spectrum, so our olive drab OD41 on the physical model in from of our eyes might not look ‘true’ in its digital version even if we have the kelvin setting spot on (tip – it’s not always the paint maker’s pigment mix which is questionable here).
‘Cool white’ LED bulbs (6500 K) are more likely to have a higher CRI value, so look for a CRI of 85 and above when buying new LED bulbs to maximise the chance of colour fidelity.
